AWS: Using Openswan for site-to-site VPN
You’ve decided to join the growing group of smart, bold businesses trailblazers by moving your network operations to the “Cloud”. And, of course, you’ve done your homework and decided that AWS is the only way to go. Good for you! Now comes the big question—“How do I connect my on premise workstations to my AWS VPC (Virtual Private Cloud—click here if you need a quick VPC refresher). You can certainly get it done by using AWS’ managed VPN service. This service consists of creating a Virtual Private Gateway in your AWS VPC to establish a site-to-site connection with your on premise VPN firewall (don’t you just LOVE the smell of VPNs in the morning!!). While this is a solid solution, the rate of $0.05/VPN per hour (ouch!) can get a bit costly if you have more than one VPN tunnel running (think multiple remote offices, like a large real estate brokerage). A cheaper alternative is to use a “software VPN” like Openswan that runs on a Linux-based EC2 instance. Although the cost of an m4.large instance on a 3-year Reserved Instance convertible term is basically the same as the AWS managed firewall, you can manage several tunnels on a single Openswan instance, which results in a significant cost savings if you have multiple tunnels. If this sounds like something right up your alley (or, if you are the more adventurous type), we’ve put together a short “How to” that should have your Openswan VPN tunnels up and running in short order.
A note on sizing: We have tested using Openswan on several instance types. There was a significant amount of packet loss using any of the t2 instance types. After moving to an m4.large instance type, there was no packet loss. The different instance types have different underlying hardware so there could be a performance issue associated with the Linux kernel and/or hardware used for t2 instances.
Creating the AWS EC2 Instance
- The first step is to launch a new EC2 instance to run Openswan:
a. Open the AWS console and navigate to EC2 under services.
b. Launch a new EC2 instance.
c. Choose your Linux distribution (In this guide, we will be using the Amazon Linux AMI but Openswan runs on most Linux distributions)
d. We recommend a minimum size of m4.large instance. We have seen a large amount of dropped packets with any of the t2 series instances.
e. Place the instance in a Public subnet.
f. Add a Name Tag to help identify (i.e. “Openswan”)
g. Create a new security group that is called “Openswan SG” and allow SSH from the Public IP of the admin machine you are using. - Disable Source/Dest. Check.
a. In the EC2 Instances section of the console select the newly created instance you are using to run Openswan.
b. Click on Actions->Networking->Change Source/Dest. Check
c. Click on Yes, Disable - — Each EC2 instance performs source/destination checks by default. This means that the instance must be the source or destination of any traffic it sends or receives. However, a VPN instance must be able to send and receive traffic when the source or destination is not itself. Therefore, you must disable source/destination checks on the VPN instance. —
- Assign an EIP (Elastic IP) to the Openswan VPN instance.
a. In the EC2 Instances section of the console click on Elastic IPs under Network & Security.
b. If you do not have an EIP available click “Allocate new address”.
c. Select the new address and click Actions->Associate Address
d. In the Instance section select the Openswan instance you created in step 1 and click Associate. - Modify the Openswan Security Group
a. Open the necessary inbound ports from your VPC. This will be based on the type of traffic you are sending through the tunnel.
b. Open UPD ports 4500 and UDP port 500 from the remote gateway you are establishing the tunnel with. This will allow the ipsec connection to be established.
Installing and Configuring Openswan
- Connect to the EC2 instance and install Openswan
a. SSH into the new instance
b. Install Openswan: sudo yum install openswan - Edit the IPSec configuration file
a. Run the following command: sudo nano /etc/ipsec.conf
b. You will need to uncomment the last line: include /etc/ipsec.d/*.conf
c. Save and exit the file 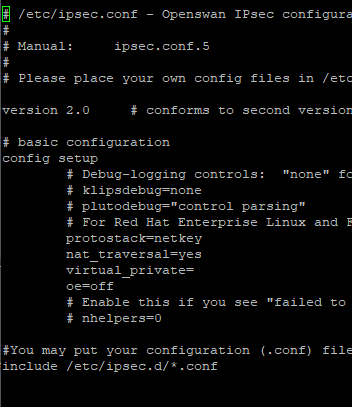
- Create a VPN configuration file: sudo nano /etc/ipsec.d/{vpnname}.conf
You will create a configuration file for each VPN tunnel you are establishing. You should name the configuration file something to help you identify the client that this connects to. Be sure to set the connection name to the same thing to keep things clean and easy to manage.
a. Paste the following text and fill in all variables with your values: conn {vpnname} #This is the name of the VPN connection
type=tunnel
authby=secret
auto=start
left=%defaultroute
leftid={EIP} #This is your Openswan EIP
leftsubnet={AWS VPC subnet} #This is the subnet you are allowing VPN access to
leftnexthop=%defaultroute
right={Remote IP} #This is the public IP of the Remote VPN device
rightsubnet={Remote Subnet} #This is the remote subnet
pfs=yes #Perfect Forward Security
ike=aes128-sha1;modp1024 #IKE Encryption Policy and Diffie-Hellman Group
ikelifetime=28800s #IKE Lifetime
esp=aes128-sha1;modp1024 #ESP Encryption Policy and Diffie-Hellman Group
salifetime=28800s # IPSec Lifetime
b. For the IKE and ESP encryption policies be sure to match the proposals that we will set on the remote device. Modp1024 is DH Group 2. To set to Group 5 you would use modp1536. - Create a Secrets File: sudo nano /etc/ipsec.d/{vpnname}.secrets
The name of the secrets file must match the name of the configuration file. This file will contain your EIP, the remote device’s public IP and the secret passphrase you will use to establish the tunnel. Paste the following into the secrets file and fill with your values:
a. {EIP} {Remote Public IP} : PSK “TheSecretPassphraseYouWantToUse”
b. Save the file and Exit
c. Be sure to include the “ ” around the secret passphrase. - Start Openswan: sudo service ipsec start
- Set Openswan to start when the machine starts: sudo chkconfig ipsec on
- Enable IP Forwarding: sudo nano /etc/sysctl.conf
a. Change the value of net.ipv4.ip_forward from 0 to 1
- Restart the Network service: sudo service network restart
If the tunnel was already configured on the remote device you will now have a working VPN connection. If not, you will need to configure the remote device and your tunnel should come up.
Some Helpful Openswan Commands
- To check the status of the Openswan service: sudo service ipsec status
This will tell you if the service is running and how many tunnels are currently active. - For a more detailed view of your tunnel connections: sudo ipsec auto –status
This will give detail on the negotiation of each tunnel. You will want to look for the connection name in “ ” and the phrase “(ISAKMP SA established)”. This will let you know that the tunnel for that connection completed properly. If the tunnel fails to come up this command will also let you know what part of the negotiation failed. - To add a new tunnel you will add a new config file and secrets file in the /etc/ipsec.d/ directory. Once added you would either need to restart the ipsec service (which would bounce all existing tunnels) or run the following commands:
a. sudo ipsec auto –add connection name
b. sudo ipsec auto –rereadsecrets
c. sudo ipsec auto –status
You should now see the additional connection with it’s status.
4. The following commands will allow you to “bounce” an existing tunnel:
a. sudo ipsec auto –down connection name
b. sudo ipsec auto –up connection name
Trouleshooting
There are typically only a few things that can cause this process to not work correctly:
1. Your tunnels are not connecting properly.
a. Run sudo ipsec auto –status and see where the negotiation is failing.
b. Verify that the proposals are the exact same on both ends of the tunnel.
c. Verify that you have allowed UDP 4500 and UDP 500 from the remote public IP on the Openswan Security Group.
2. Tunnels are up but you are not passing traffic
a. Verify that you have the appropriate ports open from your AWS VPC on your Openswan Security Group.
b. Verify that you have the appropriate ports open from the remote network on your instance security groups.
c. Verify that you have added a route to the remote network on your routing tables that point to your Openswan instance.
The process of setting up an Openswan instance to manage all of your VPN tunnels is fairly simple. As stated previously, the cost of a single managed AWS VPN tunnel using AWS VPN Gateway is $0.05/hour. And while the cost of an m4.large instance on a 3-year Reserved Instance convertible term is also $0.05/per hour, you can manage several tunnels on a single Openswan instance. Thus, the cost savings will be substantial if you have multiple tunnels.
Additonal resources:
Ipsec options: https://linux.die.net/man/5/ipsec.conf
Additonal ipsec auto commands: https://linux.die.net/man/8/ipsec_auto